선택 가능한 항목의 전경(Foreground)에 터치 피드백 쉽게 적용하기 (Selector/Ripple Drawable)
선택 가능한 항목(버튼, 리스트, 그리드 내 항목)을 커스텀하여 개발하면, 해당 항목의 선택 여부를 사용자에게 알려주기 위헤 터치 동작에 반응하도록 제작하는 것이 좋습니다.
일반적으로, 항목의 배경에 StateListDrawable(XML 리소스에서는 <selector>)를 사용하면 원하는 결과를 얻을 수 있습니다. 하지만, 하위 뷰가 배경을 가린다면 배경에서 표시되는 터치 피드백이 가려져 사용자에 대한 효과가 떨어집니다.
또한, appcompat-v7 라이브러리에서 선택 가능한 항목의 터치 피드백을 플랫폼 버전에 맞춰 쉽게 표시할 수 있도록 ?attr/selectableItemBackground 라는 속성을 제공하고 있는데, 배경에 이 속성을 적용할 경우 해당하는 뷰에 다른 색상이나 모양, 혹은 이미지를 배경으로 함께 지정할 수 없어 레이아웃을 원하는 대로 구성할 수 없습니다.
이 문제를 해결하려면 터치 피드백이 다른 뷰의 가장 앞에 표시되도록 하면 되는데요, 이는 FrameLayout의 android:foreground 속성을 사용하여 해결할 수 있습니다. (자바 코드에서 설정하려면 setForeground(Drawable)를 사용하면 됩니다)
CardView와 같이 FrameLayout을 상속하는 뷰도 동일하게 android:foreground 속성을 사용할 수 있으므로, 쉽게 터치 피드백을 적용할 수 있습니다.
예제를 통해 확인해 보겠습니다. 새 프로젝트를 생성한 후, 프로젝트의 dependency 항목에 다음과 같이 appcompat-v7을 추가해 줍니다. 예제에서 CardView도 함께 사용하므로, 해당 라이브러리도 함께 추가합니다.
[app/build.gradle]
android {
    // ... 생략 ...
}

dependencies {
    // ... 생략 ...
    // 아래 두 항목을 추가합니다.
    compile 'com.android.support:appcompat-v7:23.1.1'
    compile 'com.android.support:cardview-v7:23.1.1'
}
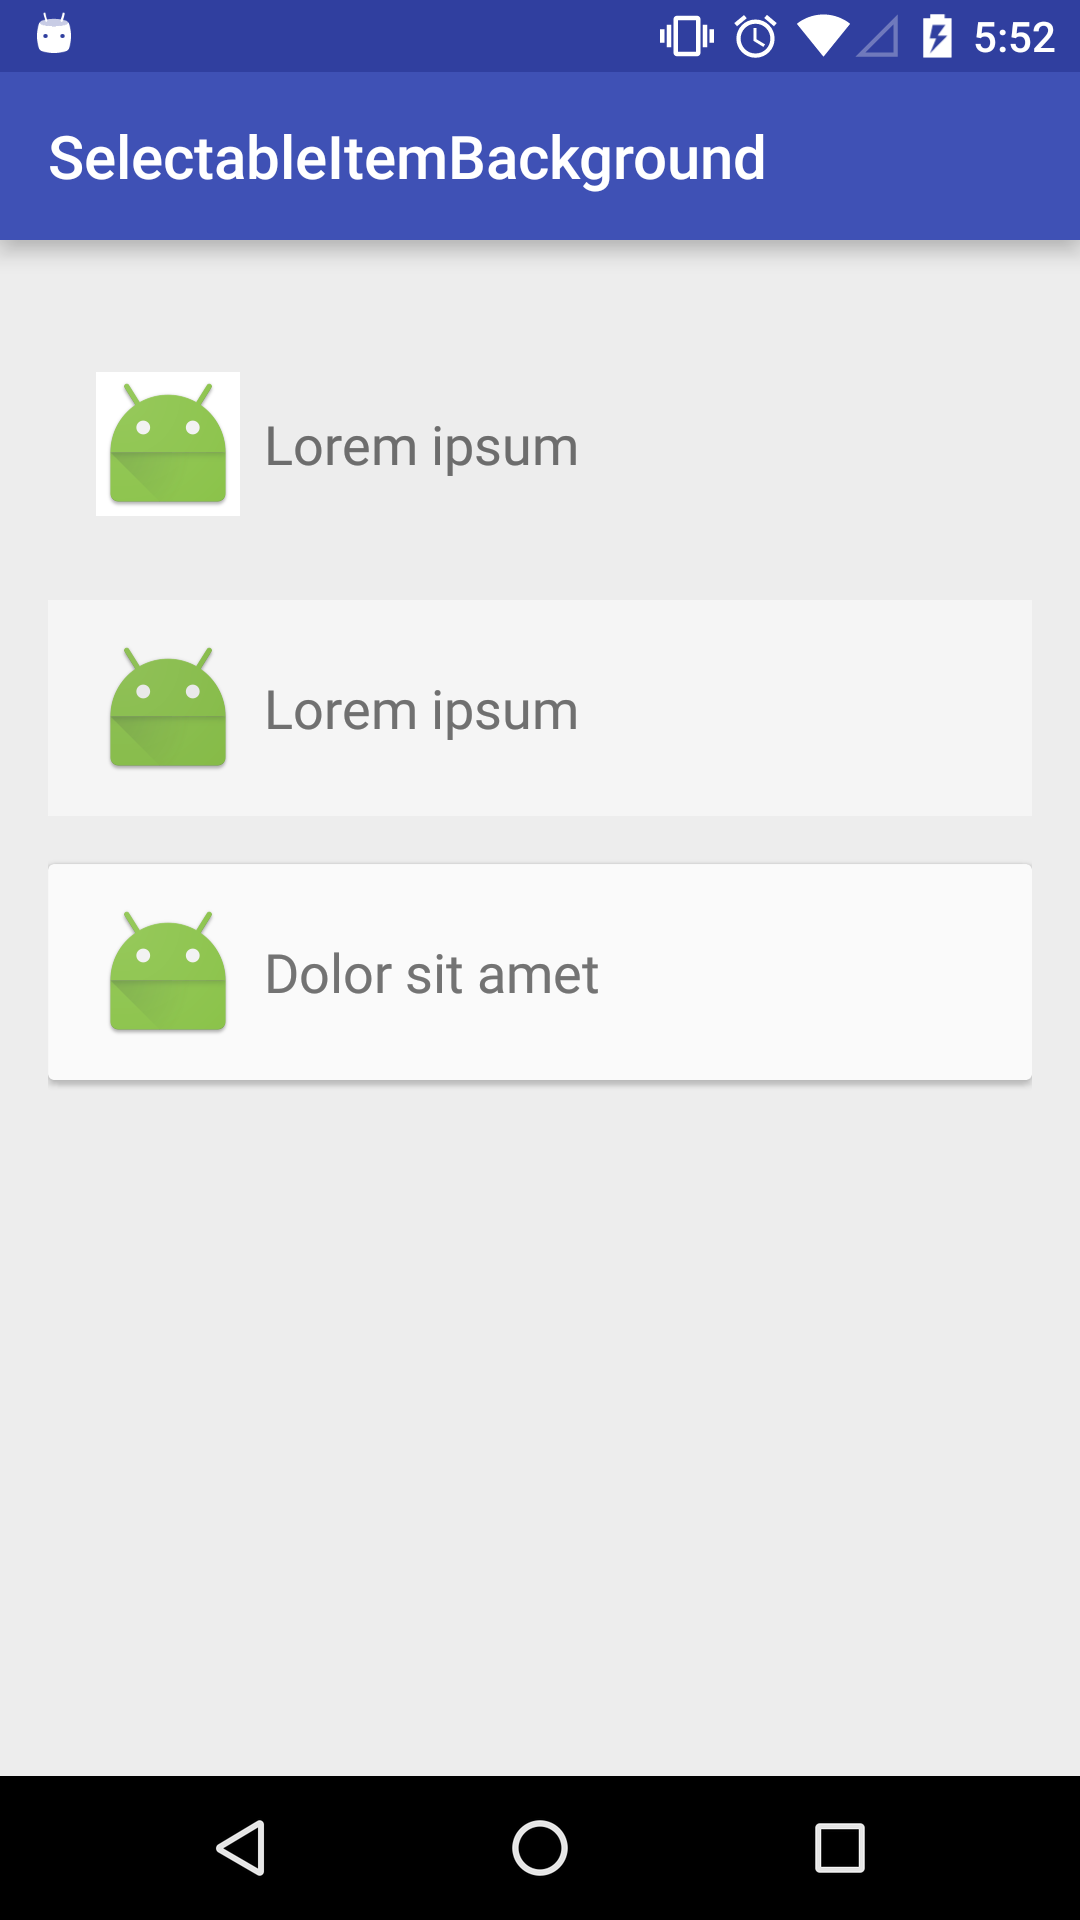
다음으로 액티비티 레이아웃을 작성합니다. 비교를 위해 가장 처음 항목엔 배경(android:background)으로 ?attr/selectableItemBackground를 지정하였고, 나머지 2개 뷰에는 android:foreground 속성에 이를 지정하여 배경 색상과 별도로 터치 피드백이 표시될 수 있도록 구성했습니다.
[activity_main.xml]
<?xml version="1.0" encoding="utf-8"?>
<LinearLayout xmlns:android="http://schemas.android.com/apk/res/android"
    android:layout_width="match_parent"
    android:layout_height="match_parent"
    android:background="#EDEDED"
    android:orientation="vertical"
    android:padding="16dp">

    <FrameLayout
        android:id="@+id/fl_activity_main_background"
        android:layout_width="match_parent"
        android:layout_height="72dp"
        android:layout_marginTop="16dp"
        android:background="?attr/selectableItemBackground">

        <ImageView
            android:layout_width="48dp"
            android:layout_height="48dp"
            android:layout_gravity="center_vertical"
            android:layout_marginLeft="16dp"
            android:layout_marginStart="16dp"
            android:background="#FFFFFF"
            android:src="@mipmap/ic_launcher" />

        <TextView
            android:layout_width="wrap_content"
            android:layout_height="wrap_content"
            android:layout_gravity="center_vertical"
            android:layout_marginLeft="72dp"
            android:layout_marginStart="72dp"
            android:text="Lorem ipsum"
            android:textAppearance="?android:attr/textAppearanceMedium" />

    </FrameLayout>

    <FrameLayout
        android:id="@+id/fl_activity_main_foreground"
        android:layout_width="match_parent"
        android:layout_height="72dp"
        android:layout_marginTop="16dp"
        android:background="#FFFFFF"
        android:foreground="?attr/selectableItemBackground">

        <ImageView
            android:layout_width="48dp"
            android:layout_height="48dp"
            android:layout_gravity="center_vertical"
            android:layout_marginLeft="16dp"
            android:layout_marginStart="16dp"
            android:src="@mipmap/ic_launcher" />

        <TextView
            android:layout_width="wrap_content"
            android:layout_height="wrap_content"
            android:layout_gravity="center_vertical"
            android:layout_marginLeft="72dp"
            android:layout_marginStart="72dp"
            android:text="Lorem ipsum"
            android:textAppearance="?android:attr/textAppearanceMedium" />

    </FrameLayout>

    <android.support.v7.widget.CardView
        android:id="@+id/cv_activity_main"
        android:layout_width="match_parent"
        android:layout_height="72dp"
        android:layout_marginTop="16dp"
        android:foreground="?attr/selectableItemBackground">

        <ImageView
            android:layout_width="48dp"
            android:layout_height="48dp"
            android:layout_gravity="center_vertical"
            android:layout_marginLeft="16dp"
            android:layout_marginStart="16dp"
            android:src="@mipmap/ic_launcher" />

        <TextView
            android:layout_width="wrap_content"
            android:layout_height="wrap_content"
            android:layout_gravity="center_vertical"
            android:layout_marginLeft="72dp"
            android:layout_marginStart="72dp"
            android:text="Dolor sit amet"
            android:textAppearance="?android:attr/textAppearanceMedium" />

    </android.support.v7.widget.CardView>

</LinearLayout>
마지막으로 액티비티 코드를 작성합니다. 각 뷰 별로 클릭 이벤트를 지정하여 터치 이벤트에 반응할 수 있도록 설정하였는데요, 클릭 이벤트를 지정하지 않고 터치 피드백이 제대로 동작하는지 여부만 확인하고 싶다면 XML 레이아웃에서 android:clickable="true"을 추가하거나, setClickable(true) 메서드를 호출하면 됩니다.
[MainActivity.java]
public class MainActivity extends AppCompatActivity {

    FrameLayout flButtonBackground;

    FrameLayout flButtonForeground;

    CardView cvButton;

    @Override
    protected void onCreate(@Nullable Bundle savedInstanceState) {
        super.onCreate(savedInstanceState);
        setContentView(R.layout.activity_main);

        flButtonBackground = (FrameLayout) findViewById(R.id.fl_activity_main_background);
        flButtonForeground = (FrameLayout) findViewById(R.id.fl_activity_main_foreground);
        cvButton = (CardView) findViewById(R.id.cv_activity_main);

        flButtonBackground.setOnClickListener(new View.OnClickListener() {
            @Override
            public void onClick(View v) {
                Toast.makeText(getApplicationContext(),
                        "Clicked FrameLayout (Background)", Toast.LENGTH_SHORT)
                        .show();
            }
        });

        flButtonForeground.setOnClickListener(new View.OnClickListener() {
            @Override
            public void onClick(View v) {
                Toast.makeText(getApplicationContext(),
                        "Clicked FrameLayout (Foreground)", Toast.LENGTH_SHORT)
                        .show();
            }
        });

        cvButton.setOnClickListener(new View.OnClickListener() {
            @Override
            public void onClick(View v) {
                Toast.makeText(getApplicationContext(),
                        "Clicked CardView", Toast.LENGTH_SHORT)
                        .show();
            }
        });
    }
}
애플리케이션을 실행하면 다음과 같은 화면이 표시됩니다.

각 항목을 터치해 보면 모두 터치 피드백이 표시되는 것을 확인할 수 있습니다. 각 플랫폼에 적합한 유형으로 표시되며, 안드로이드 5.0 미만은 StateListDrawable을 사용하여 색상만 변하고, 그 이상은 RippleDrawable 이 적용됩니다.
android:background 속성에 터치 피드백을 적용한 첫 번째 항목의 경우 터치 피드백이 이미지 배경에 가려지는 것을 확인할 수 있습니다. 또한 별도로 배경을 지정할 수 없기에 배경 색이 그대로 드러나 보이고 있습니다. 반면 android:foreground 속성에 적용한 나머지 항목은 배경 색상과 터치 피드백 모두 의도한 대로 잘 작동하는 것을 확인할 수 있습니다.


각 항목을 터치했을 때 표시되는 피드백 형태
본 포스트에서 사용한 예제 프로젝트의 전체 소스 코드는 아래에서 확인 가능합니다.